

How To Use Tftp Client Windows 10
Network admins use TFTP Servers every solar day to transfer images, configuration files, firmware, etc. to their networking devices.
TFTP is simple on its own and does not need any sophisticated messaging to work.
Of course, having no overhead is terrific, but in that location is a downside; information technology does not provide whatsoever encryption and authentication mechanisms.
Although TFTP has no congenital-in security, network admins use it for simple and fast file transfers within LANs.

And best of all, it tin be used for remote connections by hardening its security with the correct server/customer software.
In this step-past-footstep tutorial, you'll learn how to ready and configure TFTP on Windows ten.
We'll learn how TFTP works, and how to set it up on the client and server.
Permit'south get started!
What is TFTP?
TFTP (Trivial File Transfer Protocol) is a unproblematic file transferring mechanism developed equally a "lighter" version of FTP.
It attempts to over-simplify and downsize the functionality of FTP.
Instead of using the full TCP implementation, TFTP relies on the connectionless and simple UDP ship over port 69.
TFTP only allows unidirectional file transferring.
It provides zero control and has low overhead.
The original idea of creating TFTP was to provide booting for deejay-less computers or workstations that didn't have enough retentivity or disk.
These disk-less workstations unremarkably do not accept access to the full TCP/IP stack, so they need to obtain configuration information such as DHCP or BOOTP from some other server.
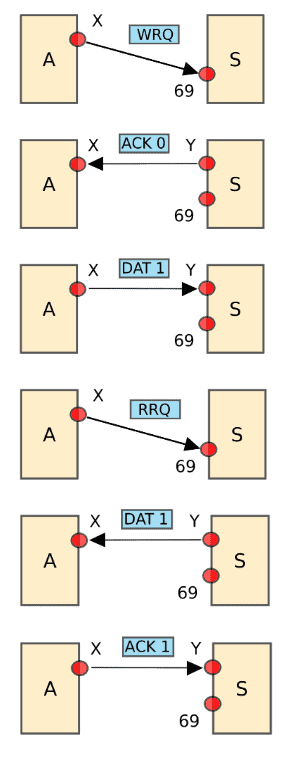
TFTP uses a client/server communication model.
As as you tin come across from the message exchange below, the TFTP server sends a block of information and waits for the acknowledgment earlier sending the adjacent ane.
A host sends a Request to Write (WRQ), the server responds with an Acknowledgement (ACK), and then the host sends data.
The host can also send a Request to Read (RRQ) and then the server sends the data and waits for an acknowledgment.
Today TFTP is ordinarily used for transferring configuration files and firmware images from and to networking devices.
It is also used for network booting by diskless nodes that need booting from the LAN.
TFTP is very like shooting fish in a barrel to implement and use.
But it is not a secured transfer method.
Information technology does not provide a login or access command machinery, so it is more than mutual in LANs.
Preparing your TFTP Environs
A TFTP server is a must-have slice of software in every network admin's toolkit.
Cisco, Huawei, Netgear, and many more than network appliances utilise TFTP for upgrading, backing-upward, and saving configuration files and firmware.
Fortunately, you can set upward and configure a TFTP server on your Windows 10 machine. You'll demand the following post if you lot're looking for a TFTP client for Windows vii
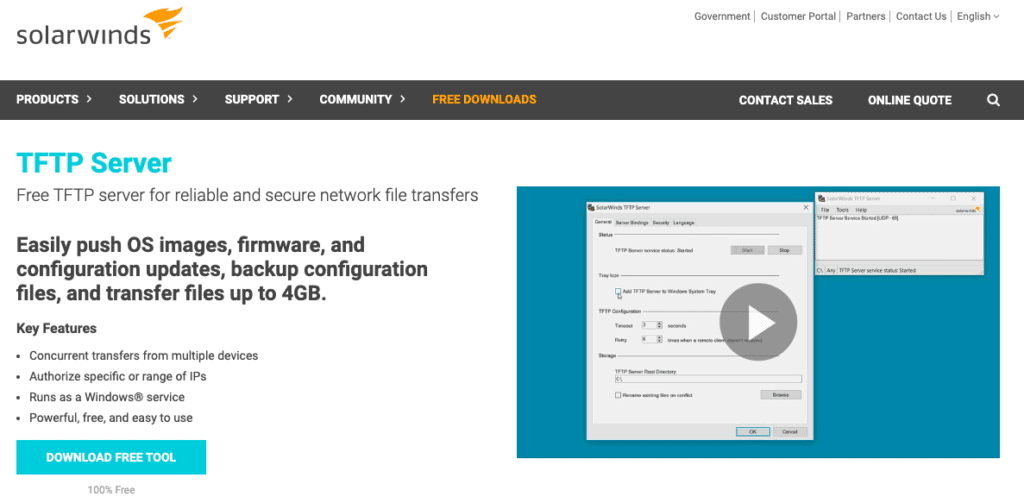
SolarWinds TFTP Server is lightweight and compatible with Windows 10.
It is a standalone free tool use for fast and easy network file transfers.
Download TFTP Server Costless!
Prerequisites Before We Start
When setting up your TFTP server for the beginning fourth dimension, consider the following requirements:
- Download the TFTP Server:
To get-go, you lot'll need to get the software. Download Solarwinds TFTP Server from its official site. The software is 100% free. - Take Admin Rights:
Setting a TFTP server requires an administrator business relationship. - Have a Root Folder Ready:
In the stop, the thought of using TFTP is to transfer files. Since you are configuring a TFTP server, you'll need to accept a folder storing all transferable files, such every bit OS firmware, configuration files, DCHP, etc. - Port forwarding:
TFTP clients might exist able to access the server inside the local network surface area without any issues, then if you lot don't demand remote file transfers, skip the port forwarding. But if TFTP clients are located across the WAN, they need their traffic to be forwarded to the correct destination. Port Forwarding is a setting in the local router that redirects requests from IP address and port number from WAN to another service on the LAN. To allow TFTP requests from remote TFTP clients into your LAN, you lot volition need to log into the router and forward the UDP port 69 to the IP address of your server. - Configuring Port Forwarding:
This varies from router to router. Generally, virtually routers have information technology under Advanced Setup > NAT > Port Frontwards. Make a new entry on the listing as Port (69) > UDP > IP Address (your IP) - Permit local firewall rules:
The local firewall might block TFTP file transfers. To let the TFTP client to successfully request data to the TFTP server, avert any firewall that might be blocking the connection. If possible, configure the firewall entering/outbound rules to let TFTP traffic. In the same mode, make sure that there are no local firewalls or routers with ACLs blocking the TFTP connection.
Setting up a TFTP Server on Windows ten
So, now you take the TFTP environment ready.
You downloaded the TFTP server software, take admin rights on the server, have the root folder with all files, made the right configurations on the local router, and you are certain that nothing is blocking your TFTP connection.
Let'south get ahead and install the TFTP server:
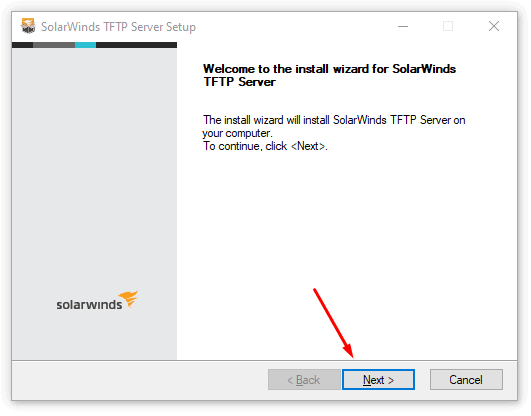
- Unpack the zip drive downloaded from the SolarWinds TFTP server and open the executable file. The SolarWinds TFTP Wizard will open, click on "Next".
Download Free!
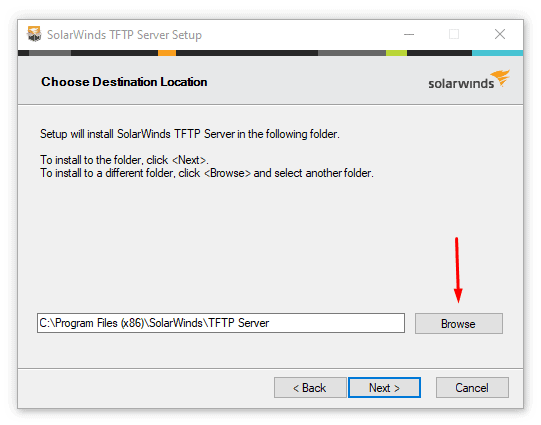
- Click "Browse" to cull a destination location.
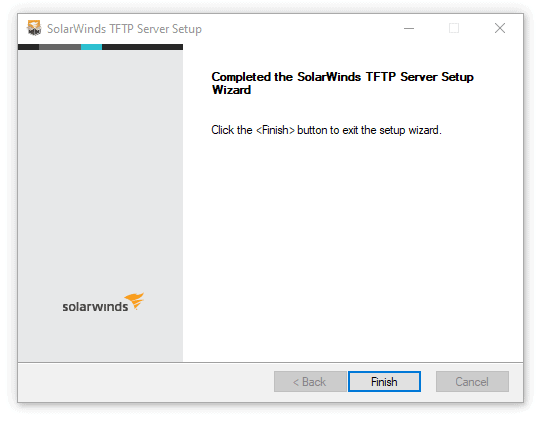
- Once the SolarWinds TFTP Server Setup finishes, click "Finish".
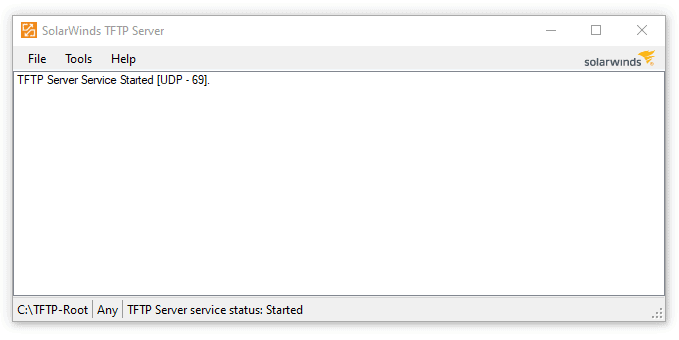
- Open the SolarWinds TFTP Server. The console should look something similar this…
Configuring Security
TFTP is known for its lack of security. Information technology does non have any encryption mechanism and does not support any customer/server authentication methods.
Without encryption and hallmark, a hacker could easily spoof the TFTP server and compromise the authenticity of disquisitional files such equally routing configuration and DCHP.
Just despite that lack of security, TFTP is notwithstanding the preferred method for quick and piece of cake file sharing on networking devices.
Having no encryption and authentication makes TFTP fast and without much overhead.
Still, some TFTP server software tin provide some features that guarantee a certain level of security.
For example:
- Restrict the use of the server to a sure range or unmarried IP addresses.
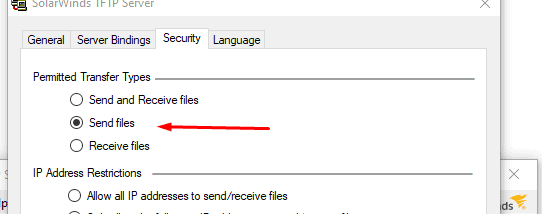
- Permit or restrict sure types of file transfers. For example, only send, receive, or both.
To configure IP address brake and file transfer types in the Solarwinds TFTP server
- Go to File > Configure.
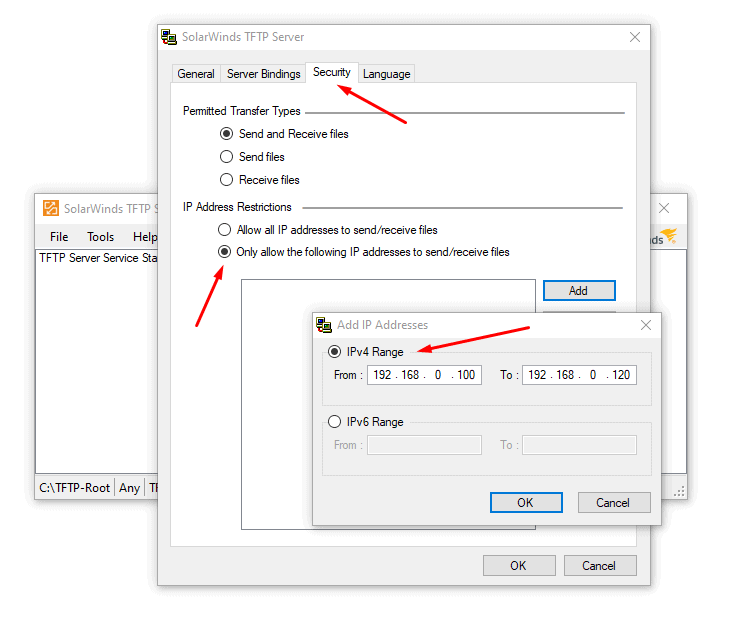
- Get to the Security tab.

- By default, Solarwinds TFTP Server will allow all IP addresses to send/receive files. Simply yous may also want to restrict the access to the TFTP server to specific IP addresses. If you want to restrict the server to a few networking devices, go ahead and click on "But permit the following IP addresses to send/receive files," then click on "Add".
- In the following screen, y'all can define the IP accost or range of addresses. For example, we are restricting access to sending/receiving files to the devices with IP from 192.68.0.100 to 192.168.0.120.
- In the same Security tab, you can too restrict transfer types. When you restrict IP addresses and transfer types, your security tin be dramatically improved. For case, you may only want to allow sending files to a specific router.
- Click Ok.
Binding the Server to Specific IP addresses, Subnet, or interfaces
The tool we're using also comes with "Server Bindings," which is another fantastic characteristic that can amend security.
Server Bindings is similar to restricting IP addresses, except that y'all can customize this restriction based on your local TFTP server network interfaces.
If your server has more than one interface, yous can customize its connectivity based on "source IP" or "subnet." In other words, you can limit the number of available interfaces that the TFTP server is listening to.
Past default, the TFTP server volition process the requests from clients received from whatsoever network interface
- If yous want to customize the server's bindings, for example, allow an entire subnet (from an interface) and allow a single IP on another, go to File > Configure > Server Bindings, and click on "Employ custom server binding."
- You likewise have the option to bind to all addresses in
 the list that y'all provided or go through the list in descending order. In one case, you finished, click "OK
Configuring the TFTP Server
First, let'due south brand sure that the service has started.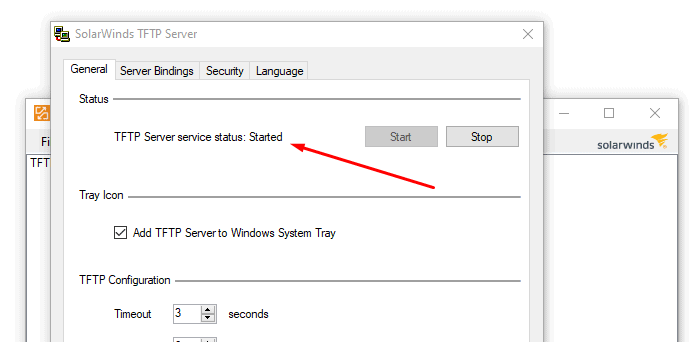
If you lot find the post-obit message: "TFP Server service status: stopped," effort clicking the "Get-go" button to start the TFTP service in the server application and wait a couple of seconds.
If it goes "stopped" again, endeavor the following.
- Go to Windows services. Open Windows search bar and type "services". Or type the Win+R keys to open the Run application and type "services.msc". Brand sure to run "services.msc" equally an administrator.
- Observe the service "SolarWinds TFTP Server" and double-click it. Make certain that its Startup Type is "Automated" and if you come across the Service status: Stopped, click the "First" button.
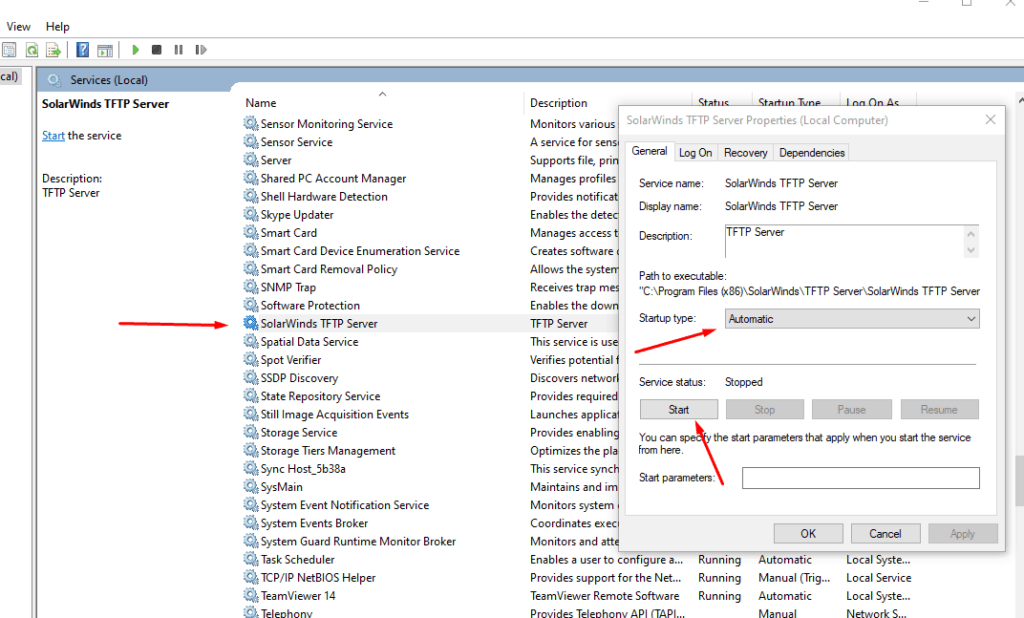
- If you still see the service "Stopped," disable any Antivirus or Firewall and examination once more. 1 of these applications might be blocking advice through port 69.
Configuring Other Parameters
- A useful setting for easier access to the awarding is to enable "Add TFTP Server to Windows Arrangement Tray".
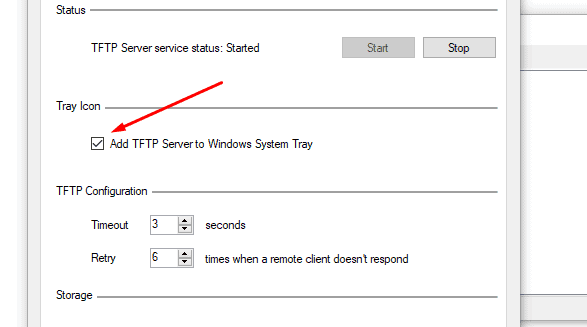
- You tin can exit Timeout and Retry options, with their default settings unless you are testing the TFTP environment
- TFTP timeout: This is the TFTP session timeout in seconds.
- Retry: The number of times, the server will retry to transmit a packet when the TFTP customer doesn't respond.
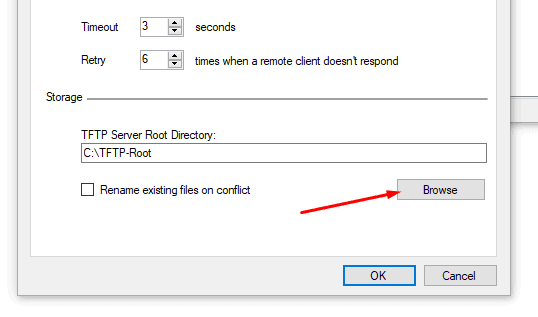
- Finally, let'due south prepare the "TFTP Server Root Directory". This is the folder where all your files received from other devices will exist stored, or where you will shop the files that volition be sent to other devices.
- Get to "Storage" > "Browse". Choose a new folder or get out the "C:\TFTP-Root" folder created by default.
- Click on "Ok".
Setting upward the TFTP Client
The TFTP Client depends on the successful installation and configuration of the TFTP server. The client is probably the i that y'all will be using the most.
The only chore you might demand to do with the server is to update the shared files and input/remove some IPs.
When using the TFTP server, don't forget about the post-obit settings (already mentioned).
- The TFTP server service has to be upwardly and the application is running.
- Configure the right TFTP folder.
- Brand sure no Firewall and Antivirus is blocking the application and connection.
- If y'all are file sharing to a remote location, don't forget about port forwarding.
- Make certain all your TFTP clients can accomplish your TFTP server.
From the TFTP client
Nigh networking devices already take TFTP enabled. For example, to transfer a Cisco Switch paradigm from the server to the device, you would take to specify the IP accost of the TFTP server on the client (Cisco Switch).
As yous can run across from the screenshot below, this switch does not accept any configuration or image filename.
It does have a default accost and a TFTP address. Then to receive these missing files, you can use the IOS command "copy tftp startup-config [ip address of the TFTP server]".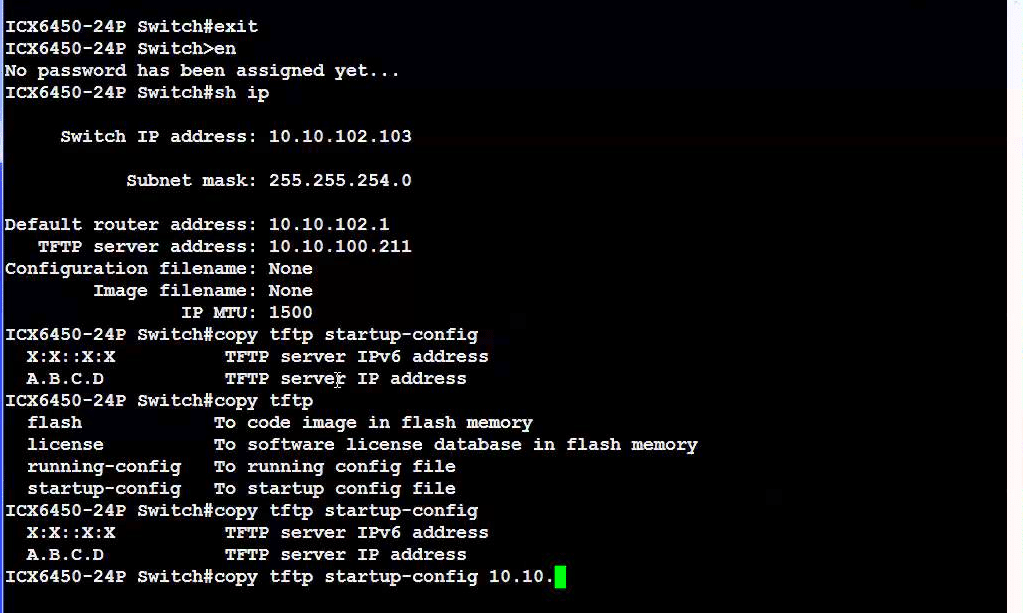
Another example, from a Huawei Switch (screenshot below).
The get-go line (TFTP get) downloads the files from the TFTP Server (192.168.0.2) to the switch.
The second line (TFTP put) uploads the files from the switch device to the TFTP server.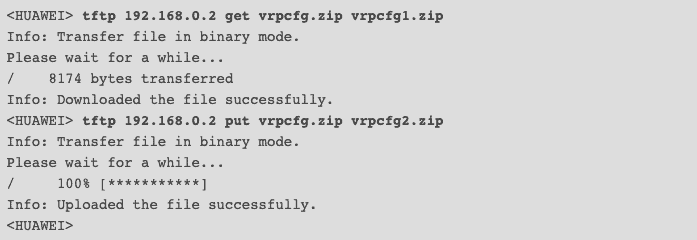
But networking devices are non the only ones that tin can run TFTP clients. You can also run the client on a Windows system.
Install TFTP Client on Windows ten
Fortunately, nigh Windows versions (servers and workstations) come up with the TFTP client feature built-in, you merely have to enable it.
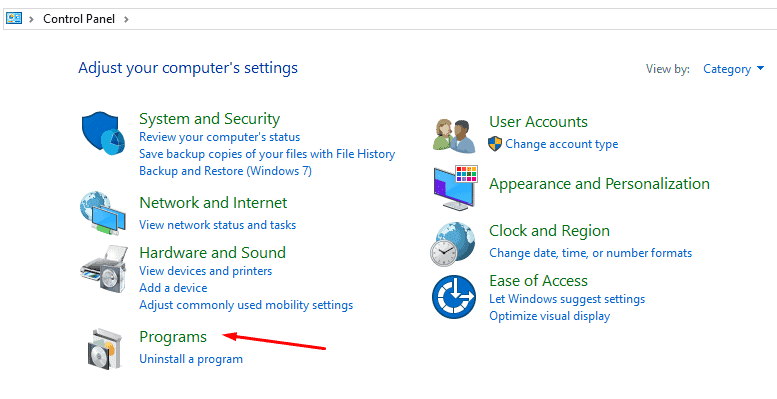
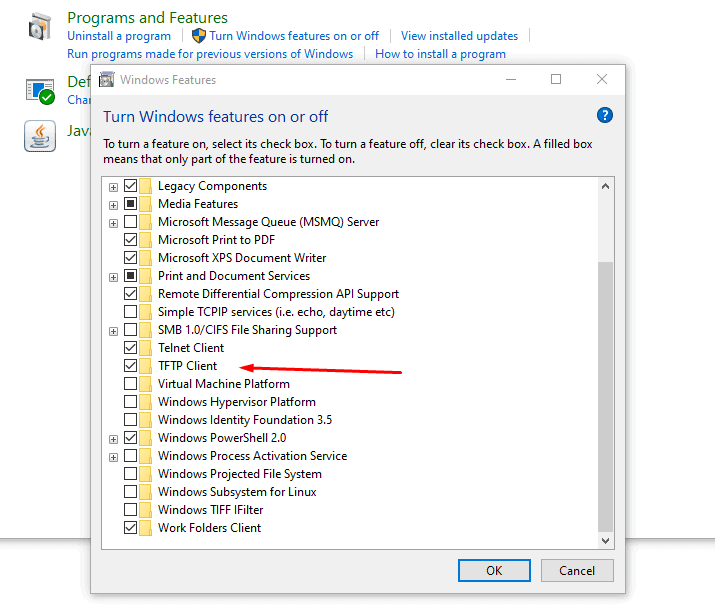
- Go to Windows Commencement and search for "Control Panel" so click on "Programs"
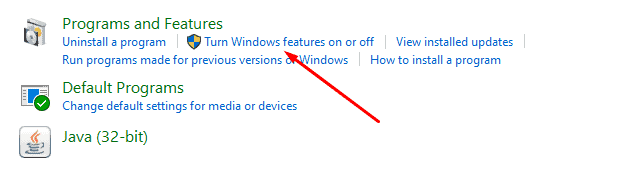
- Open up Turn Windows features on or off.
- From the Windows Features list, find the TFTP Client characteristic and turn it on. Wait for the installation to complete and click "Ok".
TFTP is considered an unsafe protocol, then Windows does not let it past default. You lot will have to either plough off the Windows firewall (which is not recommended) or add an exception on the Firewall for the TFTP Customer.
Allow'due south open up the Windows Firewall and configure the rules and exceptions to allow TFTP.
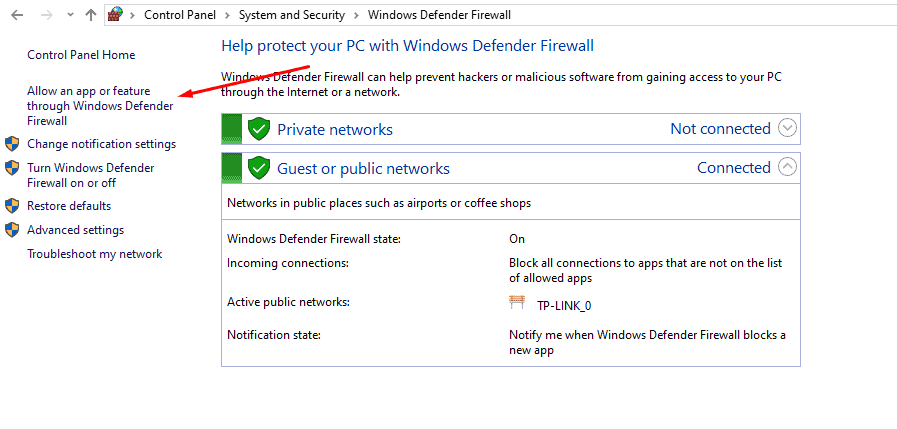
- Open the Windows Kickoff menu and type "Firewall" > open the "Windows Defender Firewall with Advanced Security," and run it as an Administrator.
- Make sure that the firewall is enabled, and click on "Allow an app or feature through Windows Defender Firewall".
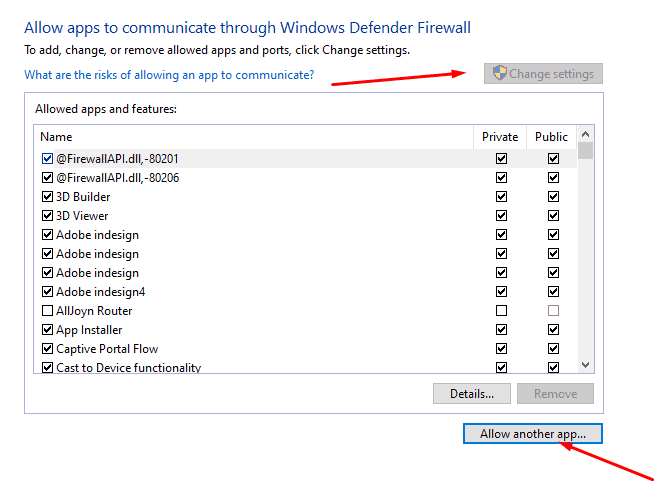
- Click on "Change Settings," so "Permit some other app".
- Click on "Scan" and find the TFTP.exe from the System32 folder and click on Open up. So click on "Add".
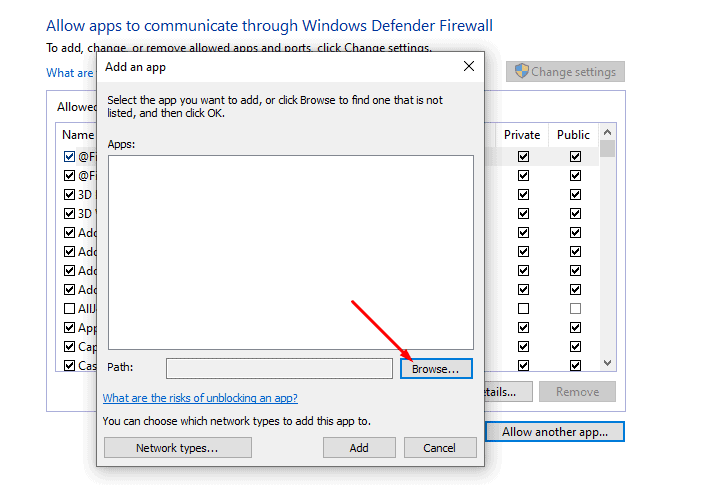
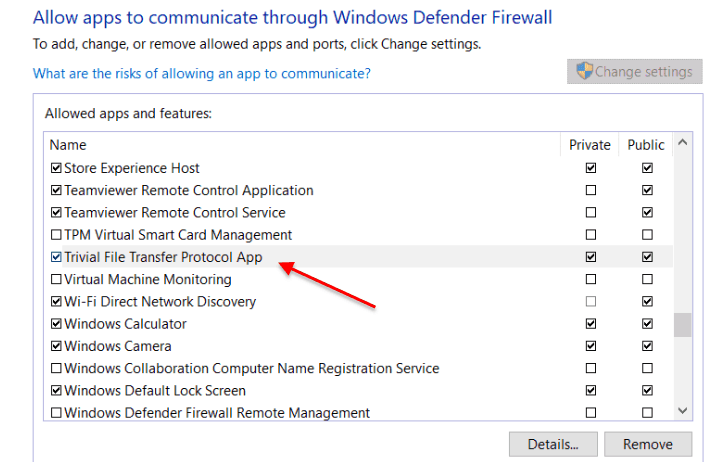
- Yous can now, detect the application on the Windows Defender Firewall, enable both Individual and Public.
Transferring Files with TFTP
At present that you enabled the native TFTP client in Windows, you can utilise it to transfer files betwixt the TFTP server.
As mentioned before, make certain that the files are nowadays in the root folder and that the client and server can reach each other.
The TFTP customer runs through the control line interface. The command sytax is:
tftp [-i] [<Host>] [{get | put}] <Source> [<Destination>]
Where:
- – i : Transfer in binary mode [likewise called octect]. If you don't specify this parameter, the transfer goes in ASCII manner, which is a regular text file transfer.
- Host: Specifies the local/remote reckoner (server).
- Put: transfers the source file [on the local computer] to the file on the destination [remote reckoner]. Employ this command to send a file.
- Get: Downloads [transfers] the file from the destination remote computer to the local figurer. Employ this command to receive a file.
- Source: Specifies the source file [with the path] to transfer.
- Destination: specifies the destination file [with the path] to go.
An example of using the TFTP control on Windows ten:
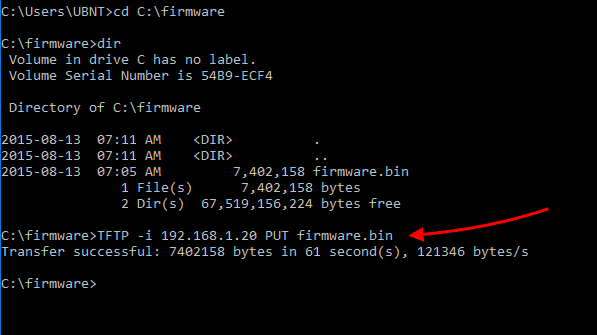
In this example, we will upload a firmware image file [.bin] to the TFTP server [192.168.1.20]. We will use the TFTP client in Windows and transfer the file using binary mode.
- Let's open the Windows command prompt. Open the Windows search and blazon "cmd," or printing the Win + R > Open up the Run and type "cmd".
- Get to the directory where the firmware is stored (or specify the entire path).
- Type the control TFTP -i 192.168.1.20 PUT firmware.bin
Last Words
TFTP is a terrific and often misunderstood transferring method.
Although it has a bad reputation for its lack of security, information technology doesn't have much overhead, making information technology a reliable, quick, and easy transferring mechanism.
Yous can use it in enclosed LANs or WANs, where speed reigns over security.
Setting up a TFTP server on Windows ten is straightforward. Just download Solarwinds TFTP Server and configure it, as shown in this tutorial.
If your TFTP client is a networking device, it will likely have the TFTP service already enabled. Merely if you lot desire to transfer files to a Windows ten workstation, you can enable the TFTP born feature.
We hope that this tutorial was informative.
Please comment if y'all have any questions about the setup and configuration of the TFTP on your Windows 10.

How To Use Tftp Client Windows 10,
Source: https://www.pcwdld.com/tftp-on-windows-10
Posted by: johnstontiledgets.blogspot.com
0 Response to "How To Use Tftp Client Windows 10"
Post a Comment